

Cleaning a wiper linkage is an essential maintenance task that ensures the smooth and efficient operation of your vehicle's windshield wipers. As a trusted wiper linkage supplier, we understand the importance of keeping these components in top condition. In this blog post, we'll guide you through the process of cleaning a wiper linkage, step by step.
Why Cleaning the Wiper Linkage is Important
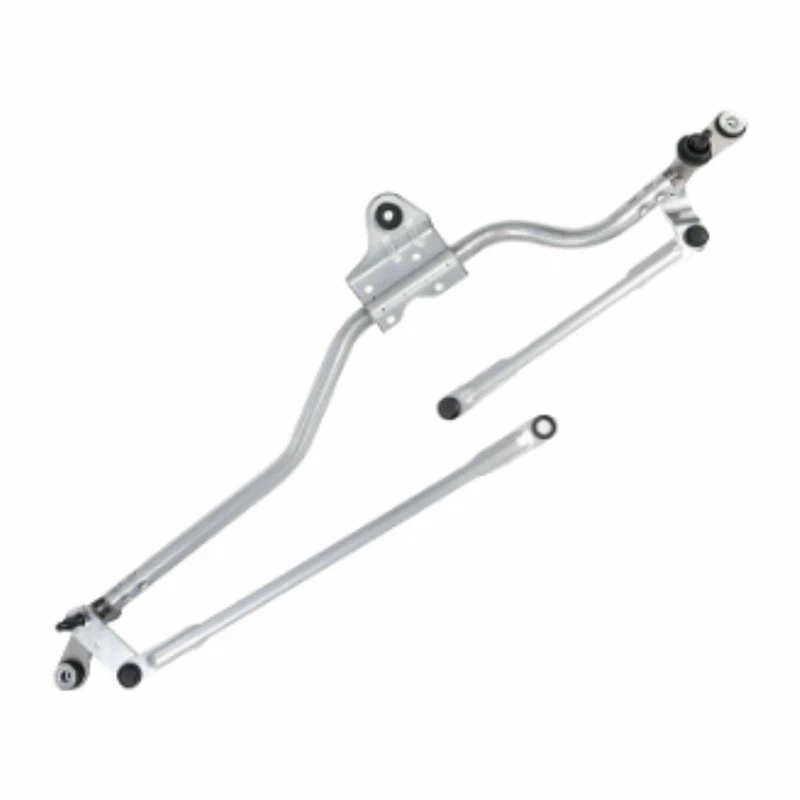
The wiper linkage is a crucial part of your vehicle's wiper system. It connects the wiper motor to the wiper arms, allowing them to move back and forth across the windshield. Over time, dirt, debris, and corrosion can accumulate on the linkage, causing it to become stiff or even jammed. This can lead to uneven wiper movement, streaking on the windshield, and reduced visibility during inclement weather. Regular cleaning of the wiper linkage helps prevent these issues, ensuring that your wipers operate effectively and keep your windshield clear.
Tools and Materials You'll Need
Before you start cleaning the wiper linkage, gather the following tools and materials:
- Socket Set: To remove the wiper arms and access the linkage.
- Screwdriver: For removing any screws or bolts holding the linkage in place.
- Wire Brush: To remove dirt and debris from the linkage.
- Cleaning Solution: You can use a mild detergent or a specialized automotive cleaner.
- Rags or Paper Towels: For wiping down the components.
- Lubricant: A silicone-based lubricant to keep the linkage moving smoothly.
Step-by-Step Guide to Cleaning the Wiper Linkage
Step 1: Prepare Your Vehicle
Park your vehicle in a safe and well-lit area. Turn off the engine and engage the parking brake. Make sure the wipers are in the off position and parked at the bottom of the windshield.
Step 2: Remove the Wiper Arms
Locate the small tab or clip on the base of each wiper arm. Press or release the tab to disconnect the wiper arm from the spindle. Carefully lift the wiper arm away from the windshield and set it aside.
Step 3: Access the Wiper Linkage
Depending on your vehicle, you may need to remove a plastic cover or trim piece to access the wiper linkage. Use a screwdriver to remove any screws or clips holding the cover in place. Once the cover is removed, you should be able to see the wiper linkage.
Step 4: Inspect the Linkage
Before cleaning, take a close look at the wiper linkage for any signs of damage or wear. Check for loose or broken parts, rust, or excessive corrosion. If you notice any significant damage, it may be necessary to replace the linkage or individual components. You can find high-quality replacement parts, such as Wiper Arm Spindle Adapter, Wiper Regulator, and Wiper Transmission Parts on our website.
Step 5: Clean the Linkage
Use a wire brush to gently scrub the wiper linkage, removing any dirt, debris, or rust. Pay special attention to the moving parts and joints. If the linkage is particularly dirty, you can soak it in a cleaning solution for a few minutes to loosen the grime. After scrubbing, rinse the linkage with clean water and dry it thoroughly with a rag or paper towel.
Step 6: Lubricate the Linkage
Apply a small amount of silicone-based lubricant to the moving parts and joints of the wiper linkage. This will help reduce friction and ensure smooth operation. Be careful not to over-lubricate, as excess lubricant can attract dirt and debris.
Step 7: Reassemble the Wiper System
Once the linkage is clean and lubricated, reattach the plastic cover or trim piece. Then, reconnect the wiper arms to the spindles. Make sure the arms are securely attached and in the correct position.
Step 8: Test the Wipers
Turn on the vehicle's ignition and test the wipers. Check that they move smoothly and evenly across the windshield. If you notice any issues, such as uneven movement or streaking, double-check the linkage and make sure it is properly assembled.

Tips for Maintaining Your Wiper Linkage
- Regular Inspection: Check the wiper linkage periodically for signs of wear or damage. Look for loose parts, rust, or excessive corrosion.
- Keep the Windshield Clean: A dirty windshield can cause the wipers to work harder, which can put additional stress on the linkage. Regularly clean your windshield to reduce the strain on the wiper system.
- Replace Worn Wiper Blades: Worn wiper blades can cause the wipers to skip or streak, which can also affect the performance of the linkage. Replace your wiper blades regularly to ensure optimal performance.
- Avoid Using the Wipers on a Dry Windshield: Using the wipers on a dry windshield can cause the blades to wear out more quickly and put additional stress on the linkage. Make sure the windshield is wet before using the wipers.
Conclusion
Cleaning your wiper linkage is a simple yet important maintenance task that can help extend the life of your vehicle's wiper system and ensure clear visibility during inclement weather. By following the steps outlined in this blog post and using high-quality replacement parts, you can keep your wiper linkage in top condition. If you have any questions or need assistance with your wiper linkage, please don't hesitate to contact us. We're here to help you find the right solutions for your vehicle. Whether you're a professional mechanic or a DIY enthusiast, we have the products and expertise to meet your needs. Contact us today to discuss your wiper linkage requirements and explore our wide range of products.
References
- Automotive Repair Manuals
- Manufacturer's Guidelines for Wiper System Maintenance